The Maker’s Atelier Utility Coat

One very wet, cold, blustery day


I have become an erratic/ non-existent blogger due to lack of time. There seems so little of it and sewing takes priority over writing, however, just recently I have made a few items I am excited enough to want to share so you may see some posts over the next few weeks.

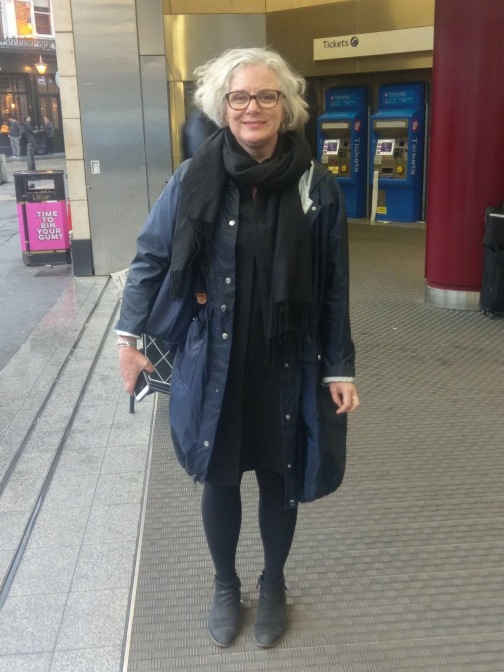
Do you ever find the perfect pattern and then match it to the perfect fabric and then for some reason not make it up? When The Maker’s Atelier launched the Utility Coat I knew immediately it had to be mine. I also knew I had to make it up in a navy and silver rip stop from Cloth House, and then……nothing.

Well, not quite nothing, I actually spent hours of my life thinking about it; worrying (would I be able to sew the fabric?), surfing (perfect haberdashery to go with perfect fabric), planning (should I try to be clever and make a reversible coat?) and dreaming.

Finally, I got sick of the roll of fabric cluttering up our flat and decided I had to bite the bullet. It turns out that rip stop fabric is surprisingly easy to cut, sew and iron (although the silver side got extremely hot, even on the coolest setting)

The pattern is very simple, the only problem I had was matching the notches on the hood, which I think may be misaligned (but could be me). To ensure a neat, rain resistant finish I used felled seams, hood seams and hems were finished with white tape, which also added some much needed weight to the fabric and the waist and hem have 3mm elastic drawstrings

My favourite bit was using my new Prym popper and eyelet tool. I added small eyelets under the arms to give some ventilation (thank you Frances for the suggestion), large eyelets on the ends of the drawstring channels and the pockets and fronts close with poppers. There is something very satisfying with snapping hardware onto a garment.

So I love this coat. Frances, as ever, has managed to produce a fabulous and stylish shape. It is very practical, being almost water-proof, large enough to accommodate extra jumpers underneath and having pockets big enough to hold my kindle (actually that was my modification). I also love the fabric which is unusual and beautiful but matches virtually everything else in my wardrobe.

There are a few things I would do differently if I made it again, but I will leave those until another post.

Broad Backs

After my Pussy Bow Blouse post Jenny asked me how I did a broad back adjustment. I’m not much of an expert at fitting but there are a few techniques I have used in the past which might help.

I have a broad back and also broad shoulders and the adjustment I use depends on what sort of fit I am trying to get.

Option 1 – for the Pussy Bow Blouse I just added strip up the centre. The pattern had to be cut on the fold so I just laid the centre back of the pattern piece 2cm from the fold and cut round it as normal. Easy, no pattern adjustment required! I also had to adjust the length of the bow across the back neck and if your pattern has a facing, you would have to adjust that too. The downside of this adjustment is that the back neck is made wider but I was lucky, as it doesn’t seem to have produced any gaping.

img_2032Option 2 – As I have broad shoulders I have in the past just added a vertical strip starting mid shoulder (figure G). This is good in that it solves both fitting issues at once, however it does mean your waistline is also affected. For this adjustment you also need to adjust the shoulder line on your front bodice

Option 3 – This is probably the adjustment I use most often. It allows me to adjust for both my broad back and broad shoulders but does not affect the waist measurement. First you draw lines as show in figure B – the first is parallel to the grain from the mid-shoulder to the waist, the second is perpendicular to this and runs to just below the arm hole. Cut across the shorter perpendicular line and then up the vertical line to the shoulder, then slide the piece you have cut out so there is a gap equal to the amount you want to adjust by (figure D). Then you have to true up the side seam so it is the same length as the original (figure F). Don’t forget to also adjust the shoulder seam on your front bodice.

img_2027Option 4 – This is good if you don’t have to adjust your shoulder line. Firstly draw the same figure B lines as you had before. Then starting at the waistline you cut up to the shoulder leaving a small hinge at the top and across the perpendicular line leaving a small hinge at the side seam. Push the side seam out leaving a gap the size of the adjustment you need (figure C). You will then need to true up the waist seam so it matches the original (figure E)

img_2028I usually determine the size of the adjustments I need by comparing the pattern pieces to my block. If the pattern is for a fitted garment I find an adjustment of up to 4cm across the back and 2cm on each shoulder is required. For less fitted garments, which will have some design ease already added, the adjustment is usually smaller. I’m not sure why this is but adding in the full 4cm means I am swamped by the finished garment.

One problem I have not been able to resolve is that if I chose a fitted pattern using my bust measurement and then add 4cm at the back I find this makes the front a bit large. Some people advocate choosing your pattern size by using your upper bust measurement, but I find my upper bust measurement is the same as my full bust despite being a D cup – this is probably again because of the broad back – so this doesn’t really help me. If anyone has a suggestion as to how I can resolve this please let me know!


Pussy Bow Blouse

img_2021I’m having a bit of a Sew Over It moment. I’ve watched Lisa Comfort since she started her business a few years ago and am extremely impressed with what she has achieved. Sewing is such a niche market yet she now has two shops in London and a huge internet presence. She has written two printed books and an e-book and runs courses online and in the shops.

Her success is in part due to her sense of style, which is pretty and vintage. The patterns are beautifully cut but simple to sew and the online shop makes it easy to select the perfect fabric.

I must admit I am not a normally a fan of vintage style but I do find that a pencil skirt and a blouse make very easy work wear.

img_2015 This outfit is the Pussy Bow Blouse and the Ultimate Pencil Skirt.  I bought both the fabric and pattern for the blouse from the Islington shop. The pattern comes in two styles, this one is the v-neck and there is a keyhole shaped neckline. I think the latter is a more modern style and would look great in a white silk.

The shape is not very fitted so rather than do my usual wide back adjustment I just added a 4cm strip (yes my back is really that wide) down the centre back. I thought this might make the back neck gape but it lies perfectly where it should. I also had to adjust the bow for the same 4cm.

Owing to the slippery fabric the cuffs on the sleeves were a little fiddly to make, but the rest of it was very simple and quick.img_2016

I’ve had lots of compliments about this blouse, particularly people saying how nice the fabric is. Most of my clothes are made out of plan fabrics so maybe I need to wear more patterns.

I’ll write about the skirt next time


A Shirt Dress

The dress of the summer has been one I bought from Whistles on a cold grey day in April. It’s been worn with tights and a vest for cold days, leggings for slightly chilly days and just as it is on really hot days. It’s been to the office, up mountains, to dinner and everywhere inbetween.

This is a picture of us at Montserrat just outside Barcelona in 32 degree heat.

img_1842

The only problem with the dress has been that it was not made out of very good quality fabric – a viscose, polyamide mix according to the label. It’s very light and floaty but a bit itchy and has developed a shine in a couple of places.

There is only one answer to this and that is to copy it! Copying most of it was fairly straight forward but the front has big pockets sewn into the dart line, a placket and a deep pleat which made it a bit difficult to trace.

img_1973

Muslin number 1 had some strange pulls across the front. But muslin number 2 was almost perfect.  The linen came from Ditto fabrics. It looks white in the pictures but is actually silver. When it arrived it was very silver and Gill warned me that some would come off.   She was quite right and now it has a lovely slightly battered look that linen should have, rather than the full on bling it arrived as.

img_1977Of course now it is turning into Autumn I can’t see that I will wear this much before next year so I am busy making a second out of black pinstripe wool.

Have you ever copied a dress you love? Did it work out?


A Rather Mundane Subject

This will be a short and prosaic post.  

I need a new iron. I’m fed up with my current iron not producing enough steam.  I’ve looked at the John Lewis website but the range of irons and steam generators (look like irons but apparently you don’t have to change the temperature……..no I don’t know either) has left me completely bemused. Do I really need to spend £200 or will a £50 job be ok? Surely it shouldn’t be this complicated.

My current iron is fairly new and I think cost around £40, so not the cheapest but not the most expensive either.  I thought it would fit the bill but one tank of water will last several loads of ironing.  The problem is that you don’t really know how these things perform until you have tried them.

Has anyone out there bought an iron recently and do you have any advice?

Sewing Books

Kate recently wrote a lovely post about Charity Shops which got me thinking about sewing books.  But first I should start my a confession.

Hi, my name is Jane and I am a book addict.

IMG_0912I come from a family of book addicts and I live with a book addict, so it’s quite a hopeless case. This is a picture of part of our library

We spend hours of our lives in book shops.  I love new books but when it comes to sewing books I nearly always find second hand shops are a much better bet.


Look at this beauty – Dressmaking Made Easy  – a 1920’s sewing book complete with lovely 1920’s ladies. Apart from zips (rarely used before the 1930’s) this tells you everything you need to know about sewing.

IMG_1924IMG_1925..and what about this one?  McCall’s Treasury of Needlecraft from 1955 has chapters on embroidery, knitting, crochet, Glitter (who can’t resist “How to Use Sparkle in Decoration”?), Hair lace and Tatting, Home Beauty (about bedspreads and household linens rather than face creams) and Gifts.  I love this Norwegian cardigan.

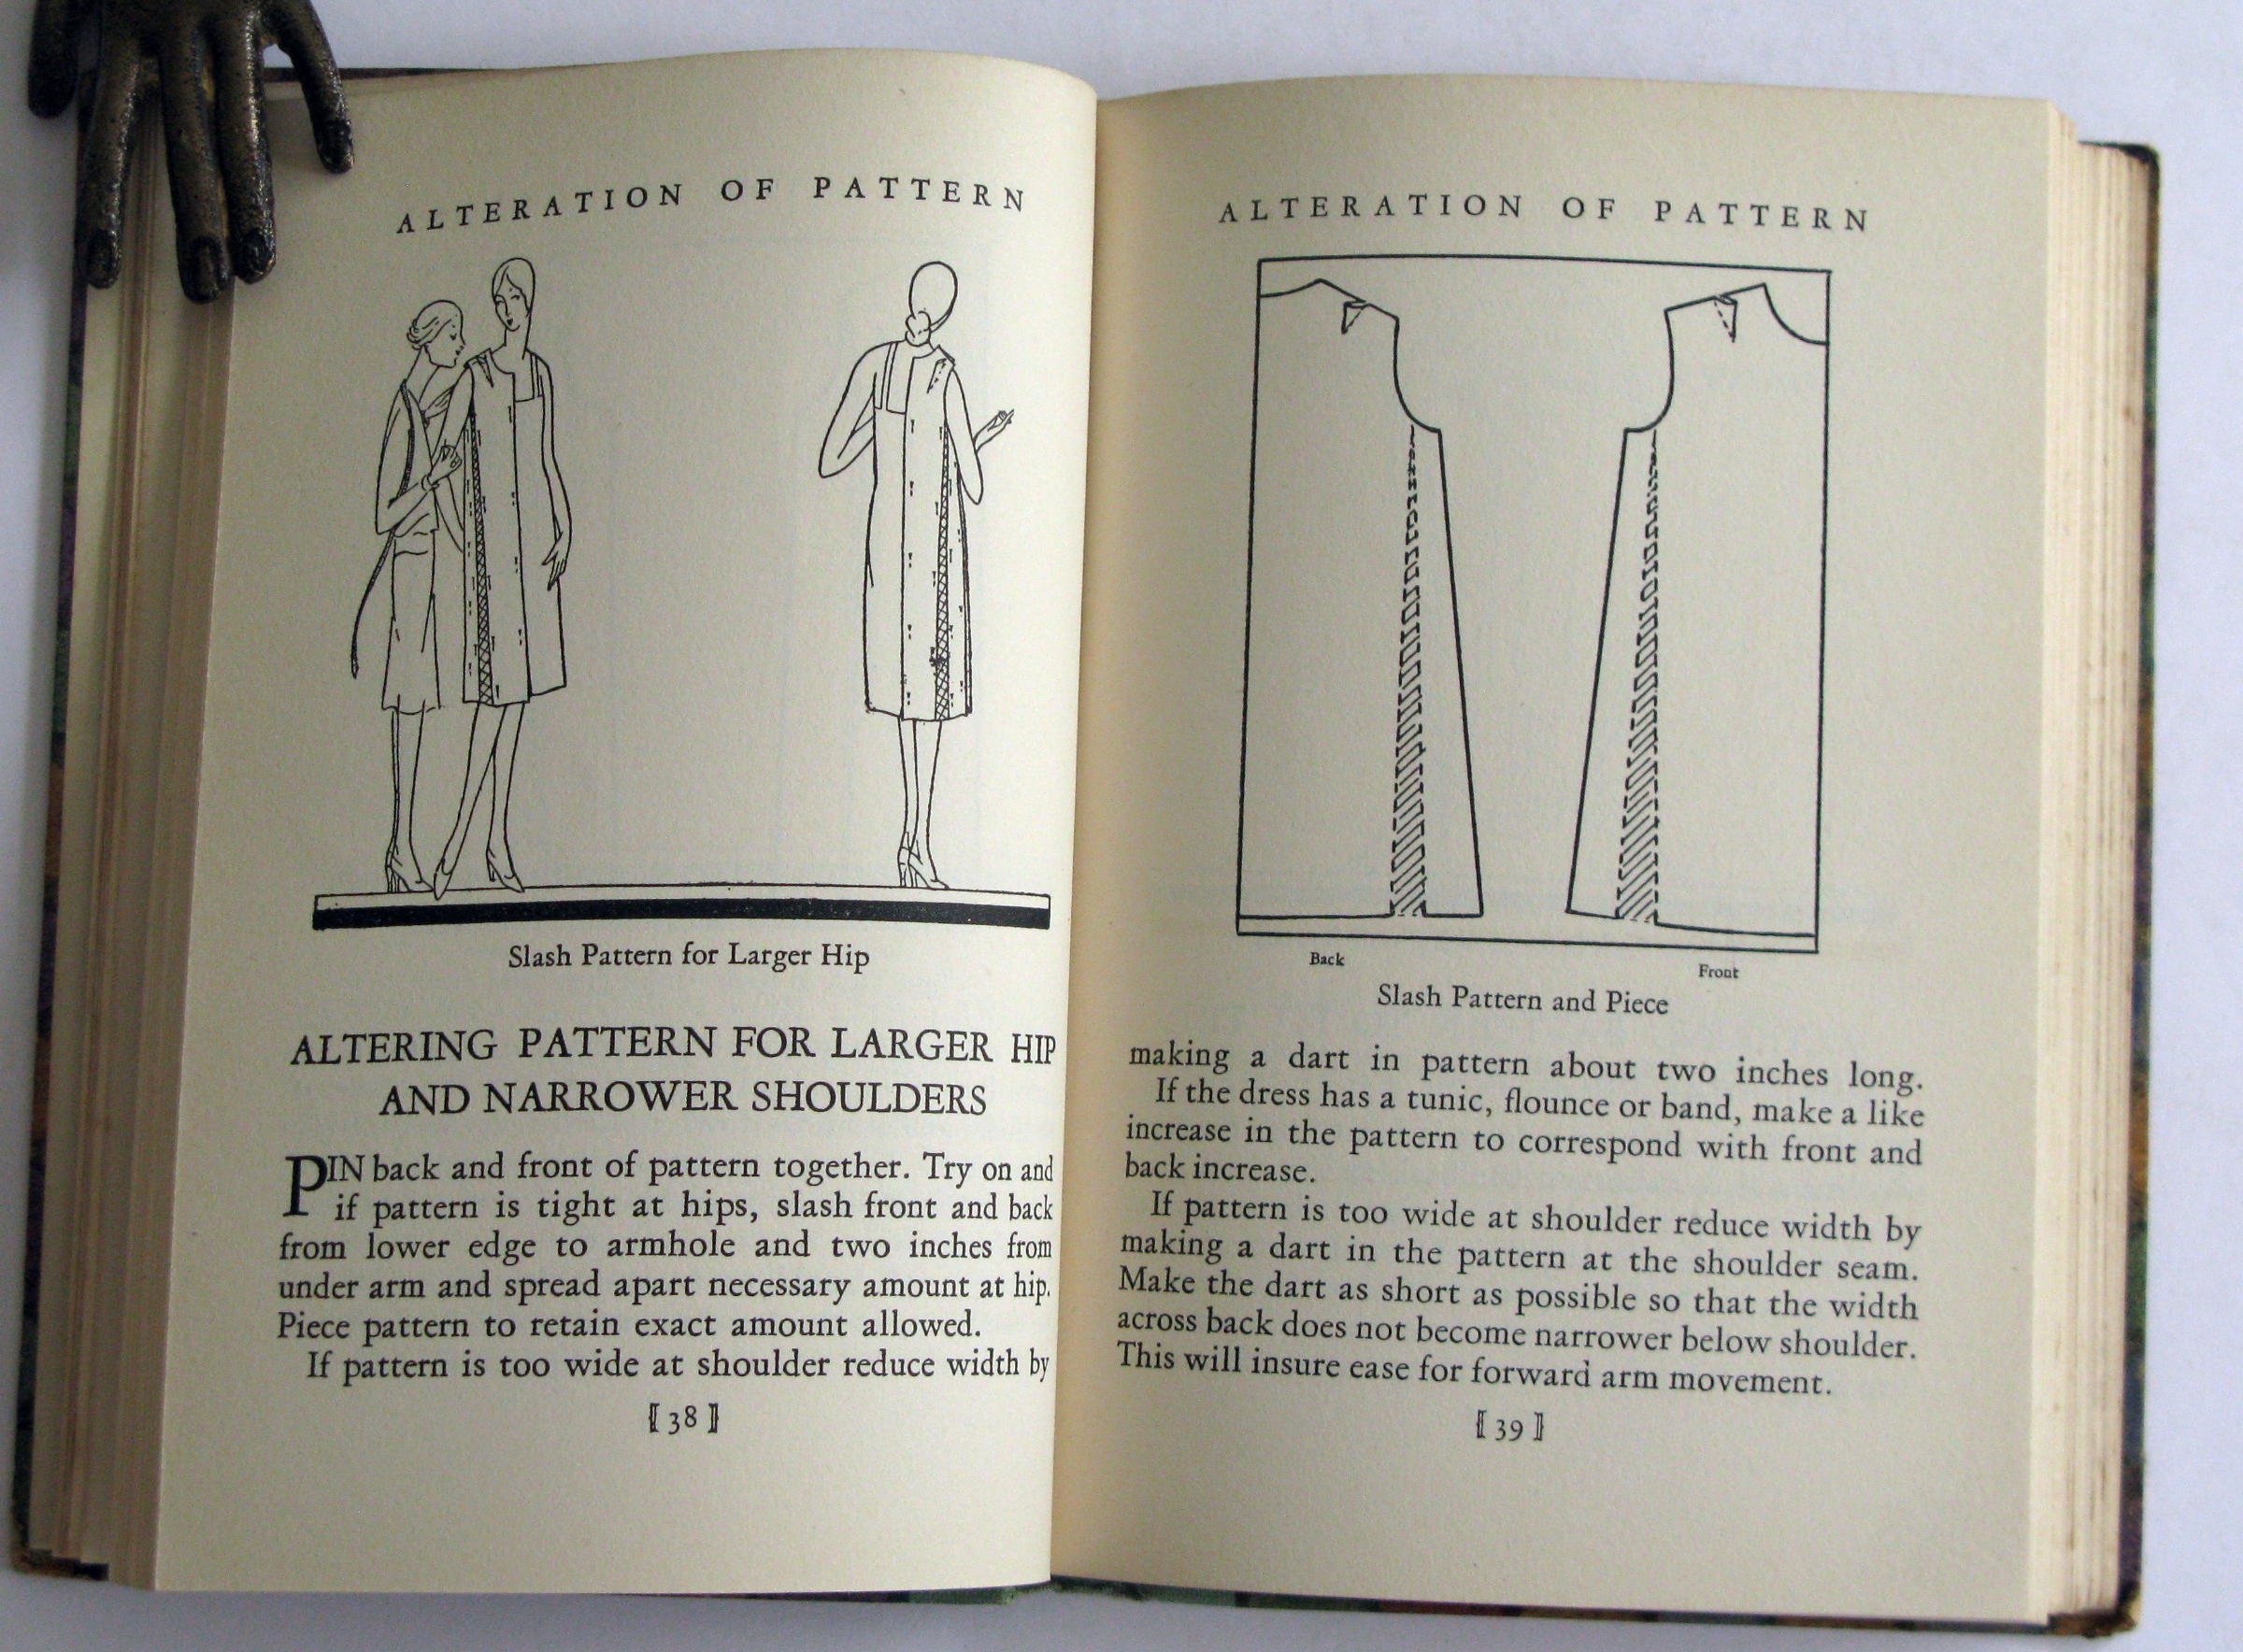
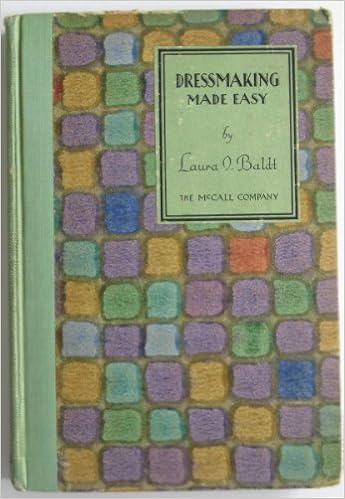
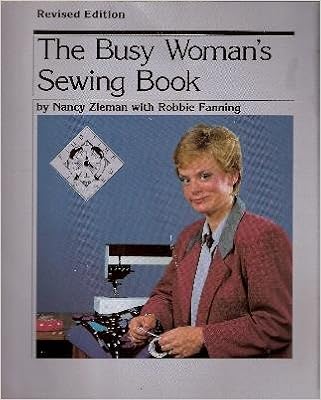
Not all my books come from McCalls, I have a couple of Nancy Zieman “Busy Woman’s” books from the 1980’s. This one is about sewing and I have another about fitting.

These are the books I turn to when I get stuck with a particularly thorny problem. They’re straight forward and detailed, turn to any page and it will be packed with information.  Want to know how to sew a placket or 8 different sorts of collar, knit 11 basic stitch patterns, crochet with sequins or elasticised yarn or adjust a pattern for a large bust, or small bust? Then these are the books for you.

I IMG_1927love modern sewing books too, however I get frustrated that so many are very basic with a greater focus on pictures than proper instructions.  I suspect this is because sewing and knitting are no longer considered basic life skills that everyone should know something about.  Hugo’s Father learnt how to knit at prep school when he was around 6 or 7, that would have been in the 1930’s.  I was given weekly sewing classes in the 1970’s and still use the needlecase I made when I was 8 or 9.  I also sewed with Mother and my Grandmother taught me how to knit.  I learnt how to crochet on the school bus after we’d got bored of French knitting (does anyone do this now that thread is wound on plastic reels rather than wooden ones?).

I should add that there are some great modern sewing books which buck this trend for style over substance.  Alison Smith’s DK Sewing Book is about as comprehensive as you can get.  Helen Joseph-Armstrong’s Pattern Making for Fashion Design is a classic and the Pattern Magic books can’t be beaten for making you think.

Do you have a favourite sewing book? Have you managed to find any treasures in second hand book shops or do you stick to new books?


Joan Dress

Do you ever find yourself hankering after something that you just know won’t be right?  This is what happened when I first saw Sew Over It’s Joan Dress which seemed the epitome of what I don’t wear but was strangely attractive. 

In a moment of weakness I bought the pattern and then found myself making a toile.  Eventually I had to admit to myself that this was a dress that was going to be made.  

The luxury crepe fabric I chose also came from Sew Over It, unfortunately this is where it all started to go horribly wrong.  The good things about this fabric are that it has the most wonderful sheen and like all polyesters it is remarkably low maintenance (no dry cleaning!).  The not so good things are that it has zero give and will only take the sharpest pins and needles -each of which leaves a small hole when withdrawn.  Seriously this fabric is like leather to work with.

Not being able to pin the fabric easily made each stage very difficult.  The most difficult part was putting in the sleeves.  Having no give it was impossible to ease the fabric without making lots of little puckers – those sleeves were unpicked so many times I was fearful for my seam ripper.  Eventually I cut down the sleeve head so that the seam lines were an identical length to those on the armscye which was the only way I could get a smooth line.  Strangely this hasn’t made the sleeves uncomfortable.

The instructions have you hem the lining and the outer shell together which produces a very clean finish.  At least it should do, unfortunately mine looked wonderful until I put the dress on and found some nasty pulling.  Strangely it all looked OK when the dress was flat.  Had I been able to stitch through all the layers I don’t think this would have been an issue, but the crepe was so dense I was finding it difficult to hand sew into it. I eventually fixed it by machining the dress and lining hem separately and adding a small tie between the two layers at the side seams.


I had to make my usual adjustments; a 2cm broad back and shoulder adjustment, a 2cm width adjustment to the sleeve head and a 1cm horizontal reduction above the bust.  I also shifted the darts towards the centre.  If I were to make it again I would probably add a further small amount to the back and lower the waist seam by about 2-3cm. I might also narrow the skirt a bit.

So do I wear it?  Actually, yes, I’m very conscious though that it isn’t my usual style but it is smart and low maintenance and sometimes that is the best you can wish for.

Spiralising – Making up the Dress

If you followed my previous post you now have a pattern which looks like a long rhomboid with necklines and armholes at one end.  The long spiral seam is shown on the diagram below in red/mustard.  This is cut on the grain so there is no problem with it stretching as you cut the fabric.

 Drapey fabrics work best.  I have made spiral dresses out of viscose jersey, silk crepe de chine and polyester triple crepe. All worked well.  You will probably want to wear a slip underneath as lumps and bumps do tend to show up.  Stripy fabrics are lovely as the stripe will curve around your body, also if you have crosswise stripes on your fabric it is very easy to match up the seam line.  The stripes on my silk dress ran down the fabric so parallel to the seam, on my jersey dress they ran across the seam.

You will need a lot of fabric, I used 2.5m but it will depend on how long you have made your pattern.  You only use quite a narrow piece so, if you’re using wide fabric, you will probably find you have enough left over for another dress. Handy if you have an accident with your over-locker (don’t ask!).  I made a pair of sleeves and a pencil skirt with my left over red crepe and still had quite a bit of unused fabric at the end.

When you put the pattern on the fabric don’t forget that you have not included any seam allowances along your spiral  seam. You could add these to the pattern but I found it relatively simple to  just cut my dress 1.5 cm wider on both sides.

To make up, sew along the spiral seam matching the notches you included when you made up the pattern, then press and finish.  I used a french seam on the silk dress , overlocked the seam on jersey and an ordinary seam on the triple crepe – in other words it doesn’t really matter which sort of seam you use. After that sew the rest of the dress as you would any other i.e. sew the shoulders, finish the neck line, add sleeves if you are using them.

Bias fabric tends to stretch so I recommend you hang the dress in the wardrobe for a few days before you hem it.

I’d love to see any dresses you make using these instructions!

Spiralising – the Pattern

I’ve been promising you the instructions for making a spiral dress and here they are!  I was given these by my lovely friend Alice Prieur who teaches pattern cutting at Raystitch, she has give me persmission to write a post about the technique.

You can make Spiral Dresses out of any fabric – both jersey and woven – it just needs a bit of drape.  If you use a stripy fabric you will find the stripes spiral around your body but plain fabrics look good too.  You can add sleeves or leave without.

What you will need;

– A pattern with a neckline, armholes and shoulders that fits well and looks good on you.  The neckline needs to be large enough to fit over your head without any fastenings.  You could draft this or use your block if you have one.  If you are making a dress with sleeves you will need those too. Don’t worry about bust shaping you won’t be needing that.

– A very large piece of paper.  This needs to be slightly wider (2-3cm) than your hips and a bit longer than your finished dress after allowing for hems and seam allowances.  Spot and cross paper is ideal as it will help you get your grainlines and angles straight, but any paper will do

– A long ruler and something to measure a 45 degree angle. I have a pattern master but it’s  not essential to use one providing you are confident about drawing the pattern accurately

– A big space to work on!

– Your hip measurement, this is the only measurement you need but it’s vital you get this right as there is no room for fitting once the dress is cut out.

Step 1 – draw two parallel lines the exact width of your hips apart. Then add a third line in the centre which is half way between the two.

Step 2 – copy your neckline and shoulders in, front on the left, back on the other.  You might need to add or remove a little from the arm holes at this stage so they fit between the lines.  The bottom of the armholes should meet in the middle.  Don’t forget to add in your notches

Draw a line across the bottom of the pattern where you want your dress to end adding a bit for a hem line.  You may find you need to adjust this when you sew up the dress.

  Step 3 – Draw a line at exactly 45 degrees from your front armhole across the pattern and down to the far side.  I started my line at the front sleeve notch on the armhole, but it doesn’t really matter where you start.  This will become your seam line so I suggest you sprinkle a few notches along it to help accurately sew it.

 Step 4 – cut along the diagonal line so you get what looks like two triangles with necklines and armholes at one end .  Then simply move the piece across to the right and paste the two long edges together to make a rhomboid.
If your diagonal does not meet exactly in the bottom right hand corner (which is
fairly normal) you might want to take a little of the bottom left and move it to the bottom right so the corners match up.


And that’s it, you now have your pattern! I will write a separate post about how to sew up.


Late addition to this post.  Hopefully you will have spotted that I haven’t added any seam allowances.  You can add them now or, do as I do, and add them in when you are cutting out the fabric


Spiral Party Dress


 Thank you all for your comments on my post about the red Spiral dress.  I am writing up the instructions for the pattern but in the mean time I have another spiral dress to show you.

 This was one of those projects that started well and then sat in the wardrobe “maturing” for a couple of years whilst I decided what to do about it.  FoIMG_1774
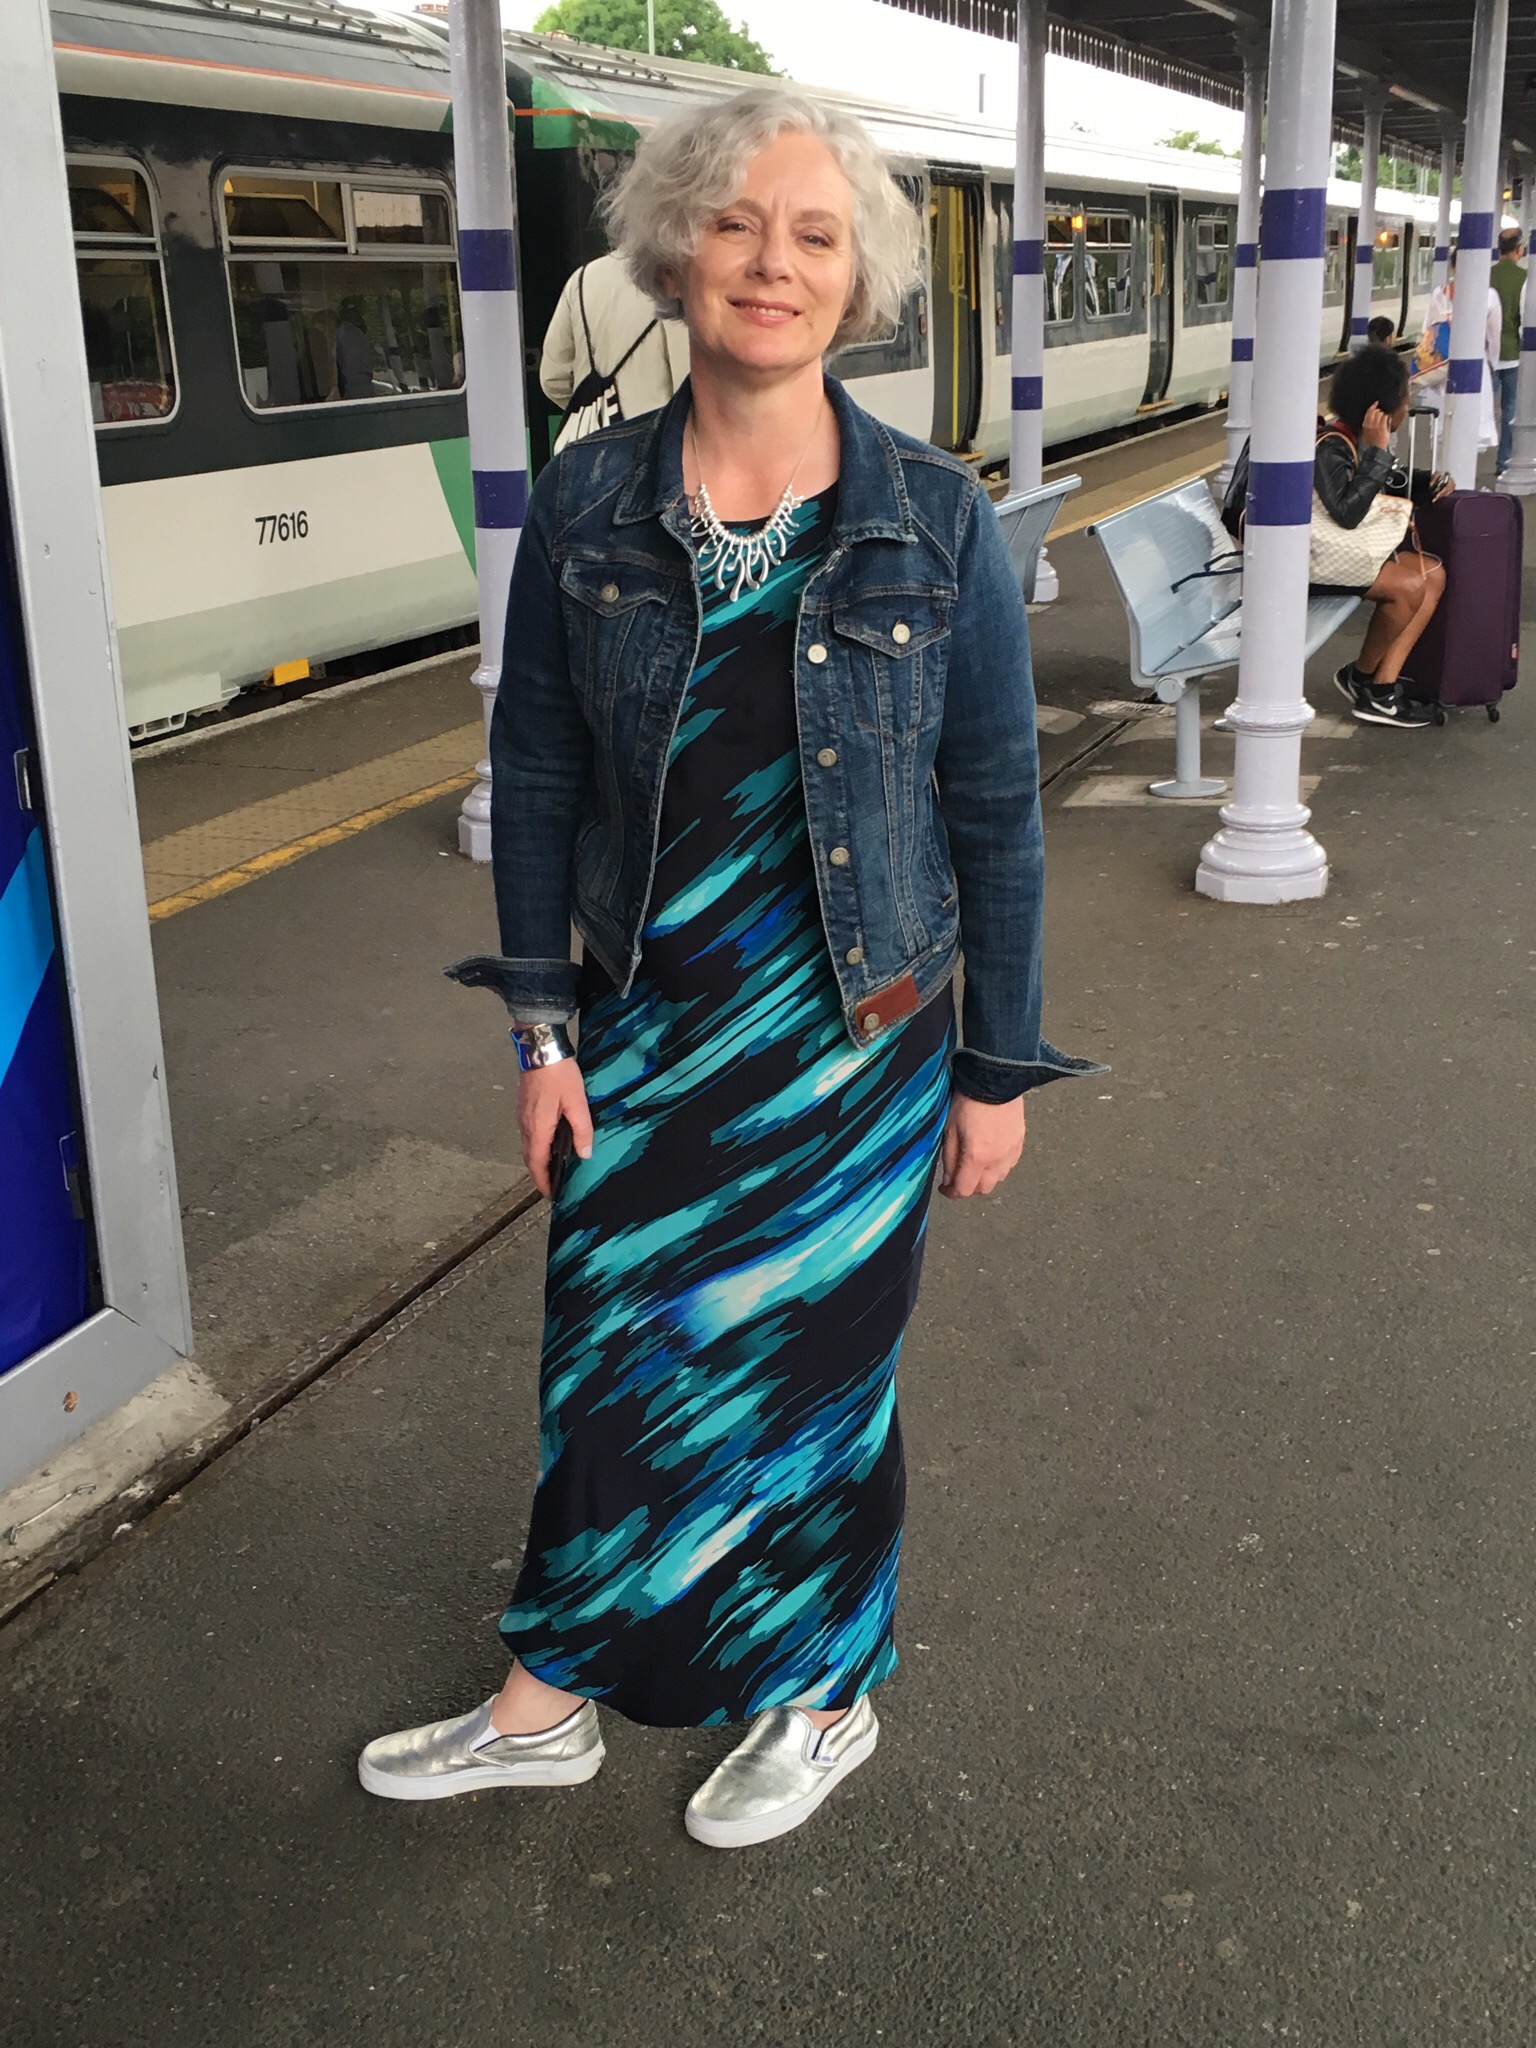
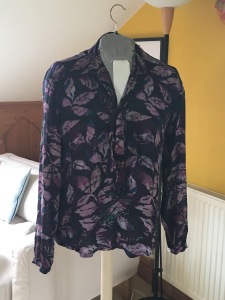
rtunately my lovely friend Alice’s birthday party gave me the motivation and impetus to get it finished.

I used crepe de chine from Beckford Silk – silk is lovely to work with and this fabric is one of the best. As always spiral dresses take a lot of space to cut out. I had stiff knees when I’d finished as the only space big enough was my bed room floor.

I pinned the spiral seam wrong sides together, ran it through the overlocker, pressed it right sides together and sewed the seam to make a very neat and easy French seam.  Using the overlocker gives an even edge and ensures you don’t have any mishaps with the seam allowances.  I was worried that with such a long seam it would be easy to find I’d made a mistake and I didn’t fancy unpicking the silk.

After that it sat in the wardrobe, and then sat in the wardrobe some more.  The problem was that I could see it had potential but I wasn’t quite sure how to finish it.  I wanted to add sleeves but didn’t want to used the striped fabric.

IMG_1770
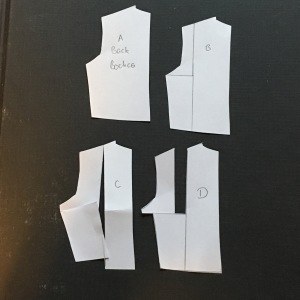
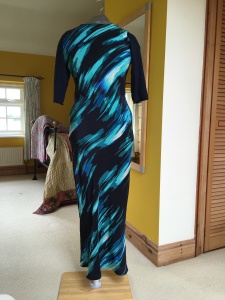
Eventually inspiration struck and two days before the party I took out my stretch sleeve block and cut a pair of sleeves from some viscose jersey.  I then added a facing at the neckline and a couple of hours before the party a rolled hem.

I’ve avoided the trend for maxi dresses up to now as they tend to make me look a bit dumpy, but I am pleased with this one.  The bias cut is flattering and very comfortable to wear.